
Ingredients
- web domain (example: bratennui.com)
- web server (example: linode)
- terminal (comes prebuilt into all Mac, Windows, and Linux operating systems)
- nextcloud software (free to download)
Notes:
- anytime you see bratennui.com in this tutorial replace it with your own domain
- you can use a domain from any registrar and any web server you wish but for our example we are using a namecheap domain and a linode server
- this process takes about 45 minutes to complete so make sure you have time and patience for installation
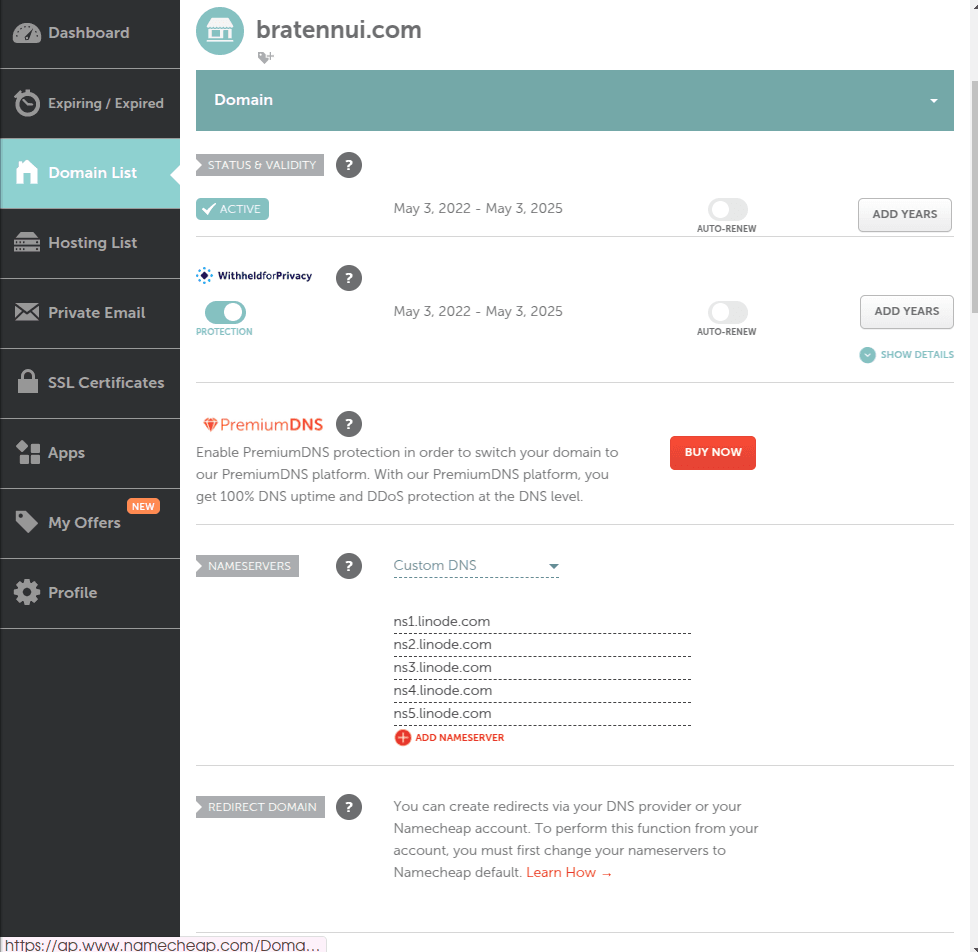
1. Point Domain To Server
in this example we are pointing a namecheap domain (bratennui.com) to the following linode name servers
ns1.linode.com
ns2.linode.com
ns3.linode.com
ns4.linode.com
ns5.linode.com
2. Create A Server
- create a linode account (to use Linode’s free trial google “linode promo” and sign up through the sponsored link. it will require a card for sign up but you won’t be charged or billed for 60 days and you’ll receive a $100 site credit to use)
- create linode
- select region closest to you
- choose os Ubuntu 24.04
- pick linode plan (recommended minimum is shared CPU 2GB)
- linode label – give linode a name
- root password – something secure that you can remember because you will have to type it in later
- skip all other options and click Create Linode
- once your Linode has been created copy your public IP Address
3. Add your domain to the server
- go to Domains
- Create Domain
- enter your domain
- enter your email
- choose Insert Default Records From My Linodes and choose the linode you created in previous step
4. Connect to the linode
connect to the server. open your Terminal and enter the command below. replace 123.456.789 with your Linode’s public IP address (you can paste by pressing control shift V)
ssh root@123.456.789 - when prompted ‘Are you sure you want to continue connecting?’ type yes and hit enter
- enter your root password you created with your linode. your password will not appear onscreen as you type it in, do not worry about that.
- when successfully logged in you will see a Welcome to Ubuntu message and the typing prompt will say root@localhost (the example below says root@bimbotech)
5. Set domain name by editing hostname and hosts files
enter the code below into your terminal to open your hostname file. replace localhost with your domain and save the file (control X Y Enter)
nano /etc/hostnameedit the hosts file and add your domain and save the file
nano /etc/hosts 6. Prepare Server
install latest updates and security patches. hit enter when prompts come up.
sudo apt update && apt dist-upgrade7. Install And Create Database
sudo apt install mariadb-server - for prompts answer:
- Do you want to continue? Y
- once that’s finished installing run the following command to do secure database installation
sudo mysql_secure_installation- for prompts answer:
- current password for root (enter for none): PRESS ENTER. DO NOT ENTER ANY PASSWORD.
- Switch to unix_socket authentication: n
- Change the root password: Y
- Set your new password and confirm the password (take note of this password you will need to use it later to log into your nextcloud. also note that when you enter your password nothing will appear on the screen and that is normal)
- Remove anonymous users? Y
- Disallow root login remotely? Y
- Remove test database and access to it? Y
- Reload privilege tables now? Y
- when successfully installed you will get the message “Thanks for using MariaDB!”
- next we create a database
sudo mariadb CREATE DATABASE nextcloud;next we create a password for our database user, replace mysecurepassword with your secure password
GRANT ALL PRIVILEGES ON nextcloud.* TO 'nextcloud'@'localhost' IDENTIFIED BY 'mysecurepassword';FLUSH PRIVILEGES; exit the database by hitting Control D
8. Install Software Dependencies
enter code below and accept installation by hitting Y or Enter
sudo apt install php php-apcu php-bcmath php-cli php-common php-curl php-gd php-gmp php-imagick php-intl php-mbstring php-mysql php-zip php-xml apache2 libmagickcore-6.q16-7-extra9. Enable PHP modules
sudo phpenmod bcmath gmp imagick intl 10. Download and Install Nextcloud
wget https://download.nextcloud.com/server/releases/latest.zipnext we download the unzip utility and unzip the nextcloud software we downloaded. unzipping latest.zip will create a cascade of code, don’t worry that’s normal.
sudo apt install unzipunzip latest.zipafter unzipping is done we clean up the zip file, change the nextcloud name to your domain, add ownership and move the domain to an accessible directory
rm latest.zipsudo chown www-data:www-data -R nextcloud/sudo mv nextcloud /var/www/bratennui.com11. Configuration
a. site configuration
edit the configuration file for your domain, it is always named yourdomain.conf
sudo nano /etc/apache2/sites-available/bratennui.com.confcopy paste the code below into the file and replace bratennui.com with your domain.
<VirtualHost *:80>
  DocumentRoot "/var/www/bratennui.com"
  ServerName bratennui.com

  <Directory "/var/www/bratennui.com/">
    Options MultiViews FollowSymlinks
    AllowOverride All
    Order allow,deny
    Allow from all
  </Directory>

  TransferLog /var/log/apache2/bratennui.com_access.log
  ErrorLog /var/log/apache2/bratennui.com_error.log

</VirtualHost>
save and exit out of the file by hitting Control X, Y, Enter
b. PHP configuration
sudo nano /etc/php/8.3/apache2/php.ini bring up search by hitting Control W and search for each item on the list below and replace the values with what is appropriate for your media storage needs then save the changes. do not forget to remove the ; at the beginning of each line you are editing!
memory_limit = 1024M

upload_max_filesize = 1024M

max_execution_time = 360

post_max_size = 512M

date.timezone = America/Los_Angeles

opcache.enable=1

opcache.interned_strings_buffer=16

opcache.max_accelerated_files=10000

opcache.memory_consumption=256

opacache.save_comments=1

opcache.revalidate_freq=1
12. setup apache
enable apache modules
sudo a2enmod dir env headers mime rewrite ssldisable default apache page and enable your domain
sudo a2dissite 000-default sudo a2ensite bratennui.com.conf restart the apache server to apply changes
sudo systemctl restart apache2check to make sure the apache server is running, once confirmed hit Q to return to the terminal
sudo systemctl status apache213. Install SSL
secure your nextcloud domain by adding an SSL certificate.
sudo apt install snapd sudo snap install core; sudo snap refresh coresudo snap install --classic certbotsudo ln -s /snap/bin/certbot /usr/bin/certbotsudo certbot --apache- enter your email
- say Y to terms of service
- say N to spam
- choose domain by entering 1
- an SSL certificate will be issued to secure your site
reboot server from terminal OR go back to linode and reboot your server so changes can take effect
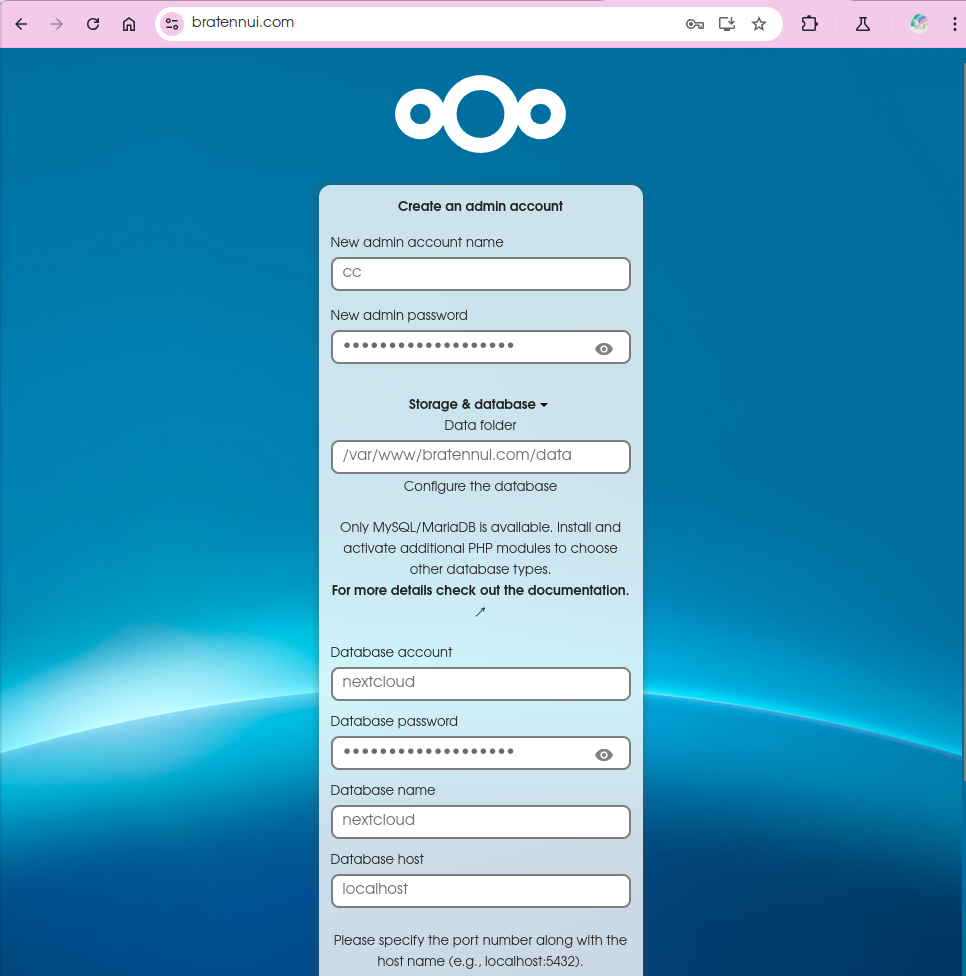
14. log into nextcloud + Initial Setup
go to your domain and you should now have a nextcloud welcome setup screen
fill out the following details
- New admin account name – whatever you want it to be in this example it’s cc
- New admin password – whatever you want your nextcloud login password to be
- Data folder – leave this field alone it is already prefilled
- Database account – nextcloud
- Database password – enter the password you created in Step 7
- Database name – nextcloud
- Database host – localhost
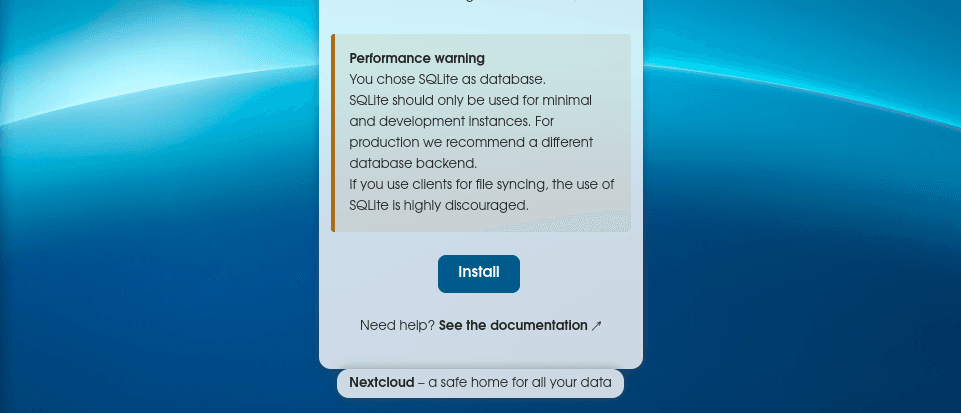
click Install
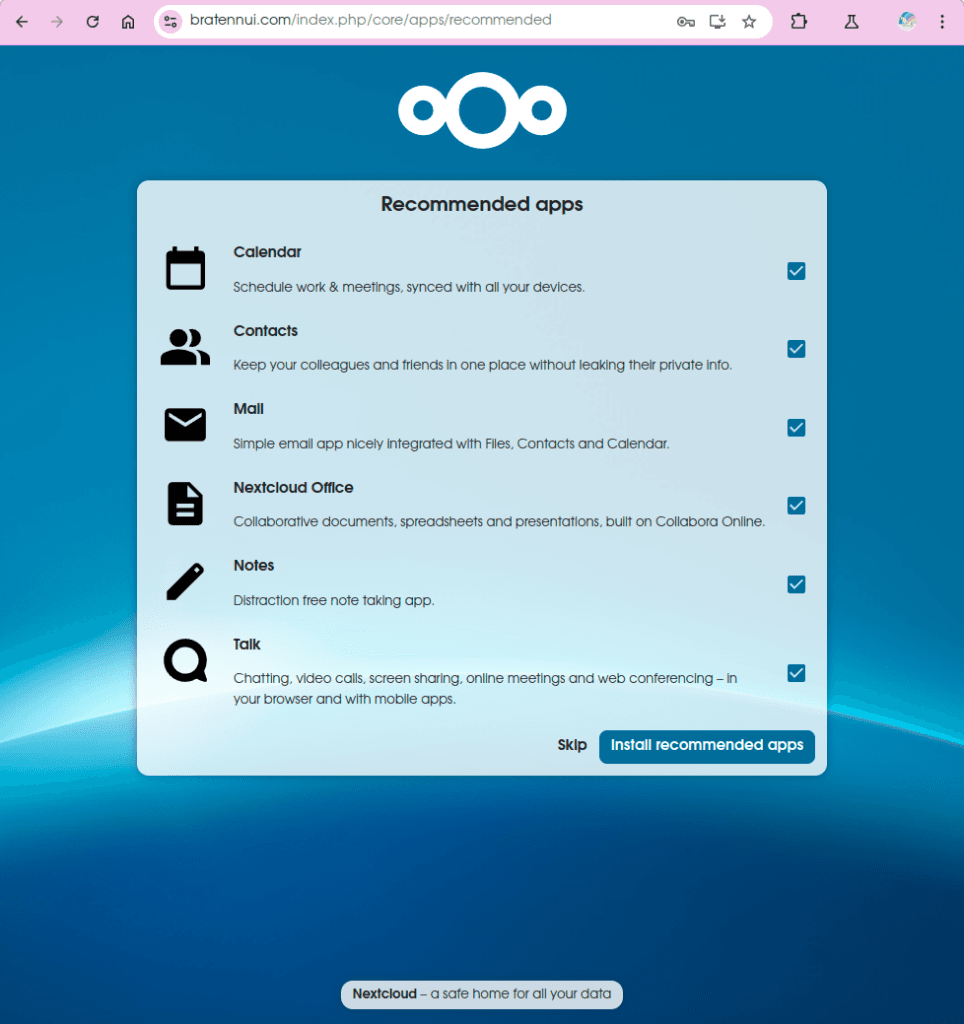
Install recommended apps or skip. up to you.
15. Voila! you should now have your brand new nextcloud dashboard
16. Securing your Nextcloud
protect your config.php file because it contains sensitive information like your password
sudo chmod 660 /var/www/bratennui.com/config/config.php

sudo chown root:www-data /var/www/bratennui.com/config/config.php
Bonus: Troubleshooting
Administration Settings Page Errors
edit the config.php file and add the following for scheduled maintenance, default phone setting and memory caching for speed.
sudo nano /var/www/bratennnui.com/config/config.php'memcache.local' => '\OC\Memcache\APCu',
'default_phone_region' => 'US',
'maintenance_window_start' => 1,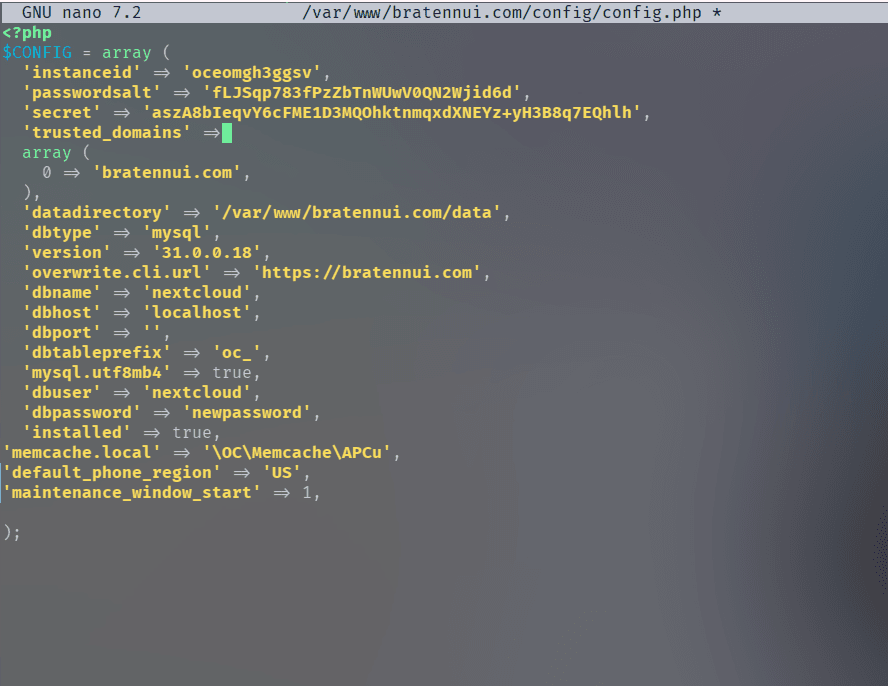
sudo nano /etc/php/8.3/mods-available/apcu.iniin the apcu.ini file add this line and save
apc.enable_cli=1run the following commands then refresh your administration settings page and some of the errors should be gone
sudo chmod +x /var/www/bratennnui.com/occ
sudo /var/www/bratennui.com/occ db:add-missing-indices